What should I set up in my Stripe account?
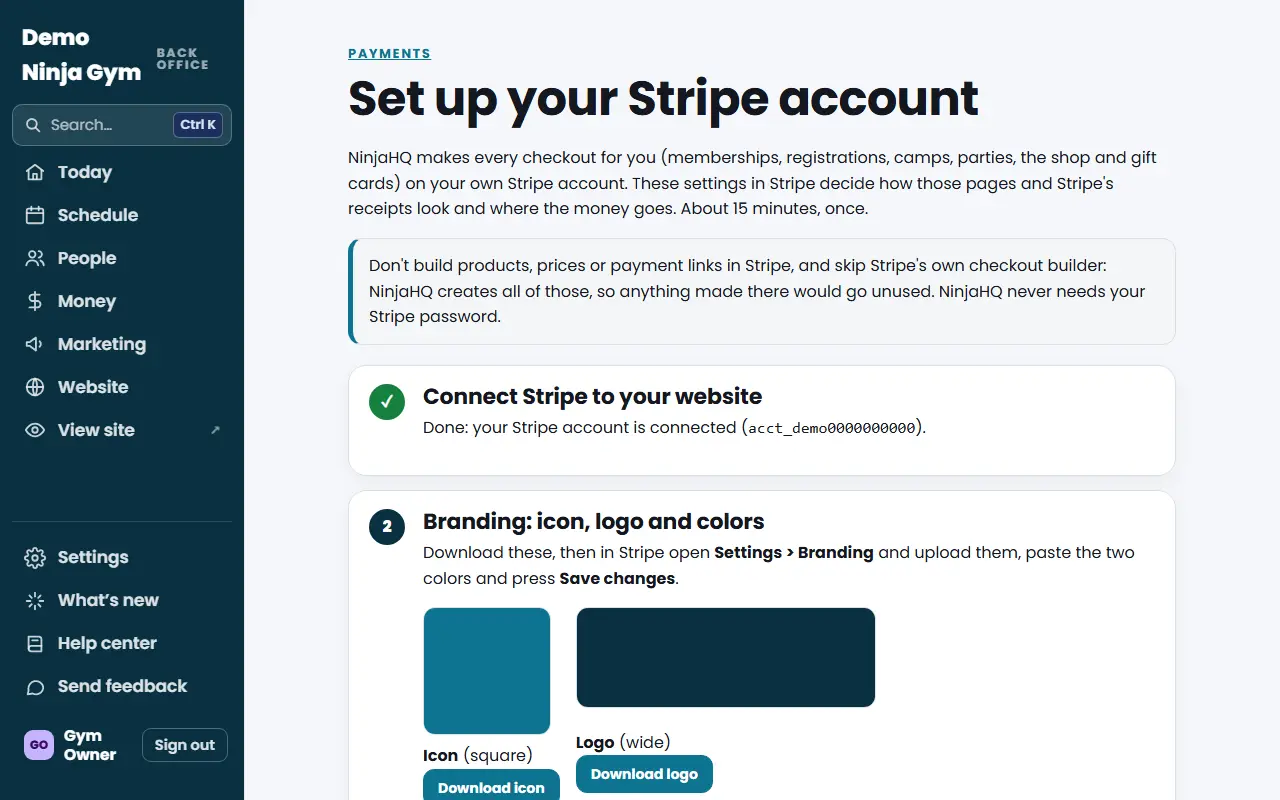
Follow the Stripe setup guide: download your icon and logo, copy your public details, add your bank for payouts and turn off Stripe's duplicate customer emails.
NinjaHQ makes every checkout for you on your own Stripe account. The settings inside Stripe decide how those pages and Stripe's receipts look and where the money goes. The Stripe setup guide walks you through them with your gym's own values filled in.
Before you begin
- Connect Stripe first: see How do I connect Stripe?.
- You need to be an owner.
- Keep your Stripe Dashboard open in another tab. Each step has a button that opens the right Stripe settings page.
Steps
Open the Stripe setup guide. It has steps in this order:
- Connect Stripe to your website. Shows as done once your account is connected.
- Branding: icon, logo and colors. Press Download icon and Download logo (both are made from your gym's logo in the sizes Stripe wants). In Stripe open Settings > Branding, upload them, copy the Brand color and Accent color shown in the guide, tick Prefer logo over icon, and press Save changes.
- Public business details. The guide shows your public business name, a statement descriptor (the name on card statements, 5 to 22 letters and numbers), a shortened descriptor, your support phone and email, and your website, each with a Copy button. Paste them into Stripe under Settings > Business > Public details.
- Payouts: where the money goes. Add the gym's bank account and choose daily or weekly payouts in Stripe under Settings > Payouts.
- Payment methods. Keep Cards, Apple Pay, Google Pay and Link on. Cash App Pay, Amazon Pay and pay-later options are your choice.
- Customer emails. Turn off Stripe's emails for successful payments and failed payments. Your website already emails families their confirmation and receipt, so leaving Stripe's on means two emails.
- Retrying declined memberships. Leave Smart Retries on so a declined monthly payment is tried again by itself.
- Sales tax (only if you collect it). Ask your accountant. See How do I turn on sales tax?.
- Who can see the Stripe Dashboard. Add owners and anyone who handles refunds or payouts under Settings > Team, each with their own sign-in. Coaches and front desk staff do not need it.
- A card reader for the front desk (optional). See How do I add a card reader?.
What you'll see
Finished steps show a check mark. After you change anything in Stripe, go back to Settings > General, press Re-check status in the Payments card, and open See what families will see at checkout to see your name, logo and colors in the drawn checkout preview.
Troubleshooting
Stripe rejects my logo or icon. Use the downloads from the guide. They are PNG files in the sizes Stripe asks for.
I changed my logo in Stripe but the preview looks old. NinjaHQ re-reads your Stripe settings when you press Re-check status (and automatically when the information is older than a few minutes).
I am stuck on a step. Use Send feedback at the bottom of the guide and a NinjaHQ expert will walk through it with you.
Questions
Should I create products or payment links in Stripe?
No. NinjaHQ makes every checkout itself. Anything you build in Stripe's own checkout builder or product catalog would go unused.
Does NinjaHQ need my Stripe password?
No.
How long does the setup take?
About 15 minutes, once.